Storyboarding is an essential tool for bringing ideas to life in the world of visual storytelling. From Hollywood blockbusters to marketing campaigns, storyboarding is used by professionals across various industries to plan and execute their projects. But what makes a great storyboard? How can we learn from the top industry professionals? And what techniques can we use to create captivating visuals? In this article, we will delve into the world of storyboarding and explore some inspiring storyboarding examples from masterful storytellers.
At its core, storyboarding is a way of planning a story using drawings. It’s like a visual outline used in movies, animations, commercials, and video games. By laying out each scene in advance, creators can see how the story will unfold, spot problems early, and make sure everyone on the team shares the same vision. This helps save time, effort, and money during production.
Creative Techniques for Storyboarding
The key to a successful storyboard is effective storytelling. And what better way to learn storytelling than from the masters themselves? One of the most celebrated storyboard artists is Walt Disney. His approach to storyboarding included creating a visual "flow" of the story, leveraging the use of colour and light to evoke emotions and focusing on the smaller details that truly bring a story to life.
Another great example is Pixar Animation Studios. Their storyboarding process involves "pitching" their ideas to the team and using their input to make the story better. This collaborative approach has led to some of the most successful and beloved animated films of all time.
So, what are the key components of good storyboarding examples? First and foremost, it must effectively tell the story and convey the intended message. The visuals should be clear, concise and visually appealing. A good storyboard should also effectively communicate the pacing and flow of the story, making it easier for the team to understand and execute.
Learning from the Masters
Learning from the best is a great way to improve our own skills. In the world of storyboarding, there are plenty of resources available, from workshops and masterclasses to online tutorials and forums. One great resource is the annual Storyboard Summit, where top industry professionals share their knowledge and techniques with aspiring storytellers.
For those looking for a more hands-on approach, there are various mentorship programs available, where individuals can work closely with experienced storyboard artists and receive personalized feedback and guidance.
Techniques for Captivating Visuals
Creating interesting and captivating visuals is crucial in storyboarding. Here are some techniques used by the masters to make their storyboards stand out:
1. Character Expressions: Infusing characters with a range of facial expressions and body language can significantly enhance their presence and the emotional depth of the story.
2. Perspective and Camera Angles: Experimentation with perspectives and camera angles can add layers of depth and interest to a storyboard, offering fresh viewpoints and dynamic storytelling.
3. Color and Lighting: Strategic use of color and lighting can dramatically affect the mood of a scene. For instance, warm hues might evoke joy and optimism, while cooler tones might suggest melancholy or suspense.
4. Varying Shot Sizes: A mix of shot sizes—close-ups, medium shots, wide shots—can enrich the visual narrative, guiding the audience’s focus and influencing the story's pace.
Artwork by Andrea Cabral
Bringing Ideas to Life
The primary goal of storyboarding is to transform abstract ideas into concrete visual forms, making them easier to understand and communicate. By visualizing the narrative, creators can spot potential pitfalls and make necessary adjustments before diving into full-scale production, thereby optimizing resources and efforts.
Moreover, storyboards can also be used as a tool for pitching ideas to stakeholders or clients. A well-crafted storyboard can help convey the vision and potential of a project, making it easier to get buy-in and funding.
Key Components of a Good Storyboard
Storyboarding is an essential part of the creative process, whether for film, animation, marketing videos, or any project that requires visual storytelling. A good storyboard helps organize ideas visually, communicate the flow of a story, and set the stage for execution. Below are the key components that make a storyboard effective, along with tips, examples, and common mistakes to avoid.
Clear and Effective Storytelling
Storyboarding is really about telling a story using pictures. Each frame should show an important part of the story and help move it forward. A good storyboard makes it easy to understand what’s going on, even without any words. The main idea of the story should be clear right from the beginning so that it grabs the viewer’s attention. Then, as the story continues, it should have a clear path—showing a challenge, building tension, and ending with a solution or resolution.
Transitions between scenes are also important. They should show changes in time, place, or emotion so that everything flows smoothly. For example, a commercial storyboard might start with a person struggling to use a product, then show how the product solves their problem, and end with that person feeling happy and relieved. Each frame should focus on one clear moment or action.
Avoid trying to put too much into a single image, because that can confuse people. Also, make sure you don’t leave out key story parts—if anything important is missing, the whole story can feel incomplete. In the end, clear and simple visuals are best. They don’t need to be detailed art, just easy to understand and focused on the story.
Concise and Clear Visuals
Clear visuals are one of the most important parts of a good storyboard. The drawings don’t have to be fancy—simple sketches or even stick figures can work as long as they clearly show what’s happening. Each frame should show the action, characters, or setting in a way that’s easy to understand. The goal is to help the team quickly see what’s going on without needing a lot of extra explanation.
It’s helpful to focus on important actions, like a character opening a door or the camera zooming in. Make sure the setting is clear too, so it’s easy to tell where each scene is happening. For example, one frame might show a person walking across a room, and the next might zoom out to show the full room they’re in.
Avoid making your drawings too detailed—it can take attention away from what really matters. Also, make sure your actions are easy to recognize. If the drawings are too vague, people might not understand what’s supposed to happen in the final version.

Artwork by Andrea Cabral
Pacing and Flow
Pacing and flow are important for keeping a story interesting. In a storyboard, this means showing when scenes move quickly or slowly, and how long each shot should last. This helps the team get a clear idea of how the final story will feel. For example, emotional moments can use longer shots to give them more weight, while action scenes often use quicker, shorter shots to add energy. Each frame should lead smoothly into the next so the story is easy to follow. To show movement, like a character walking or the camera zooming in, you can add arrows or little notes.
A good example of this is a suspenseful scene: you might start with a wide shot of someone walking up to a door, then cut to fast, close-up shots as they nervously reach for the doorknob. That change in pacing helps build tension. It’s also important to avoid sudden or confusing changes between scenes, and not to keep everything at the same speed—mixing up pacing helps keep people engaged.
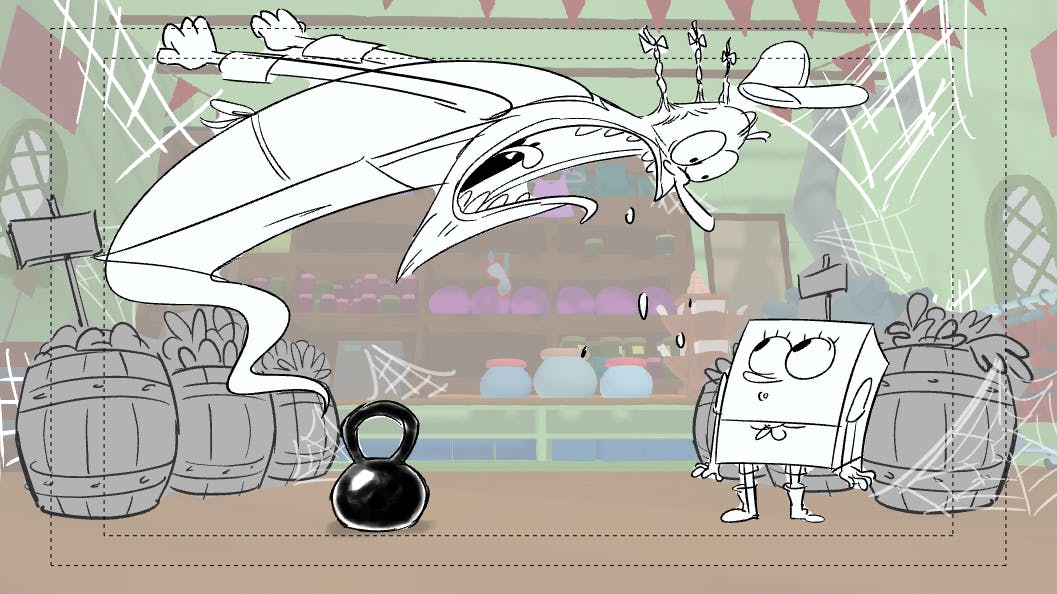
Character Expressions and Body Language
Character expressions and body language are key to making a storyboard feel alive. They show how a character is feeling and help set the tone for each scene. Since there’s no spoken dialogue in a storyboard, emotions have to come through clearly in the visuals. That means using noticeable facial expressions and showing how characters move or react to what’s happening around them.
In a storyboard, it’s helpful to exaggerate emotions a bit—small facial details might not be clear enough in simple sketches. Showing how a character stands, walks, or uses their hands can reveal their mood just as much as their face does. For example, in a romantic comedy storyboard, one frame might show a surprised face with wide eyes, and the next might show the same character blushing and smiling after a flirty moment.
Avoid giving characters blank or stiff expressions, because it can make the scene feel flat. And be sure the emotions match what’s happening in the story—if a character goes from sad to cheerful, that shift should make sense in the context of the scene.
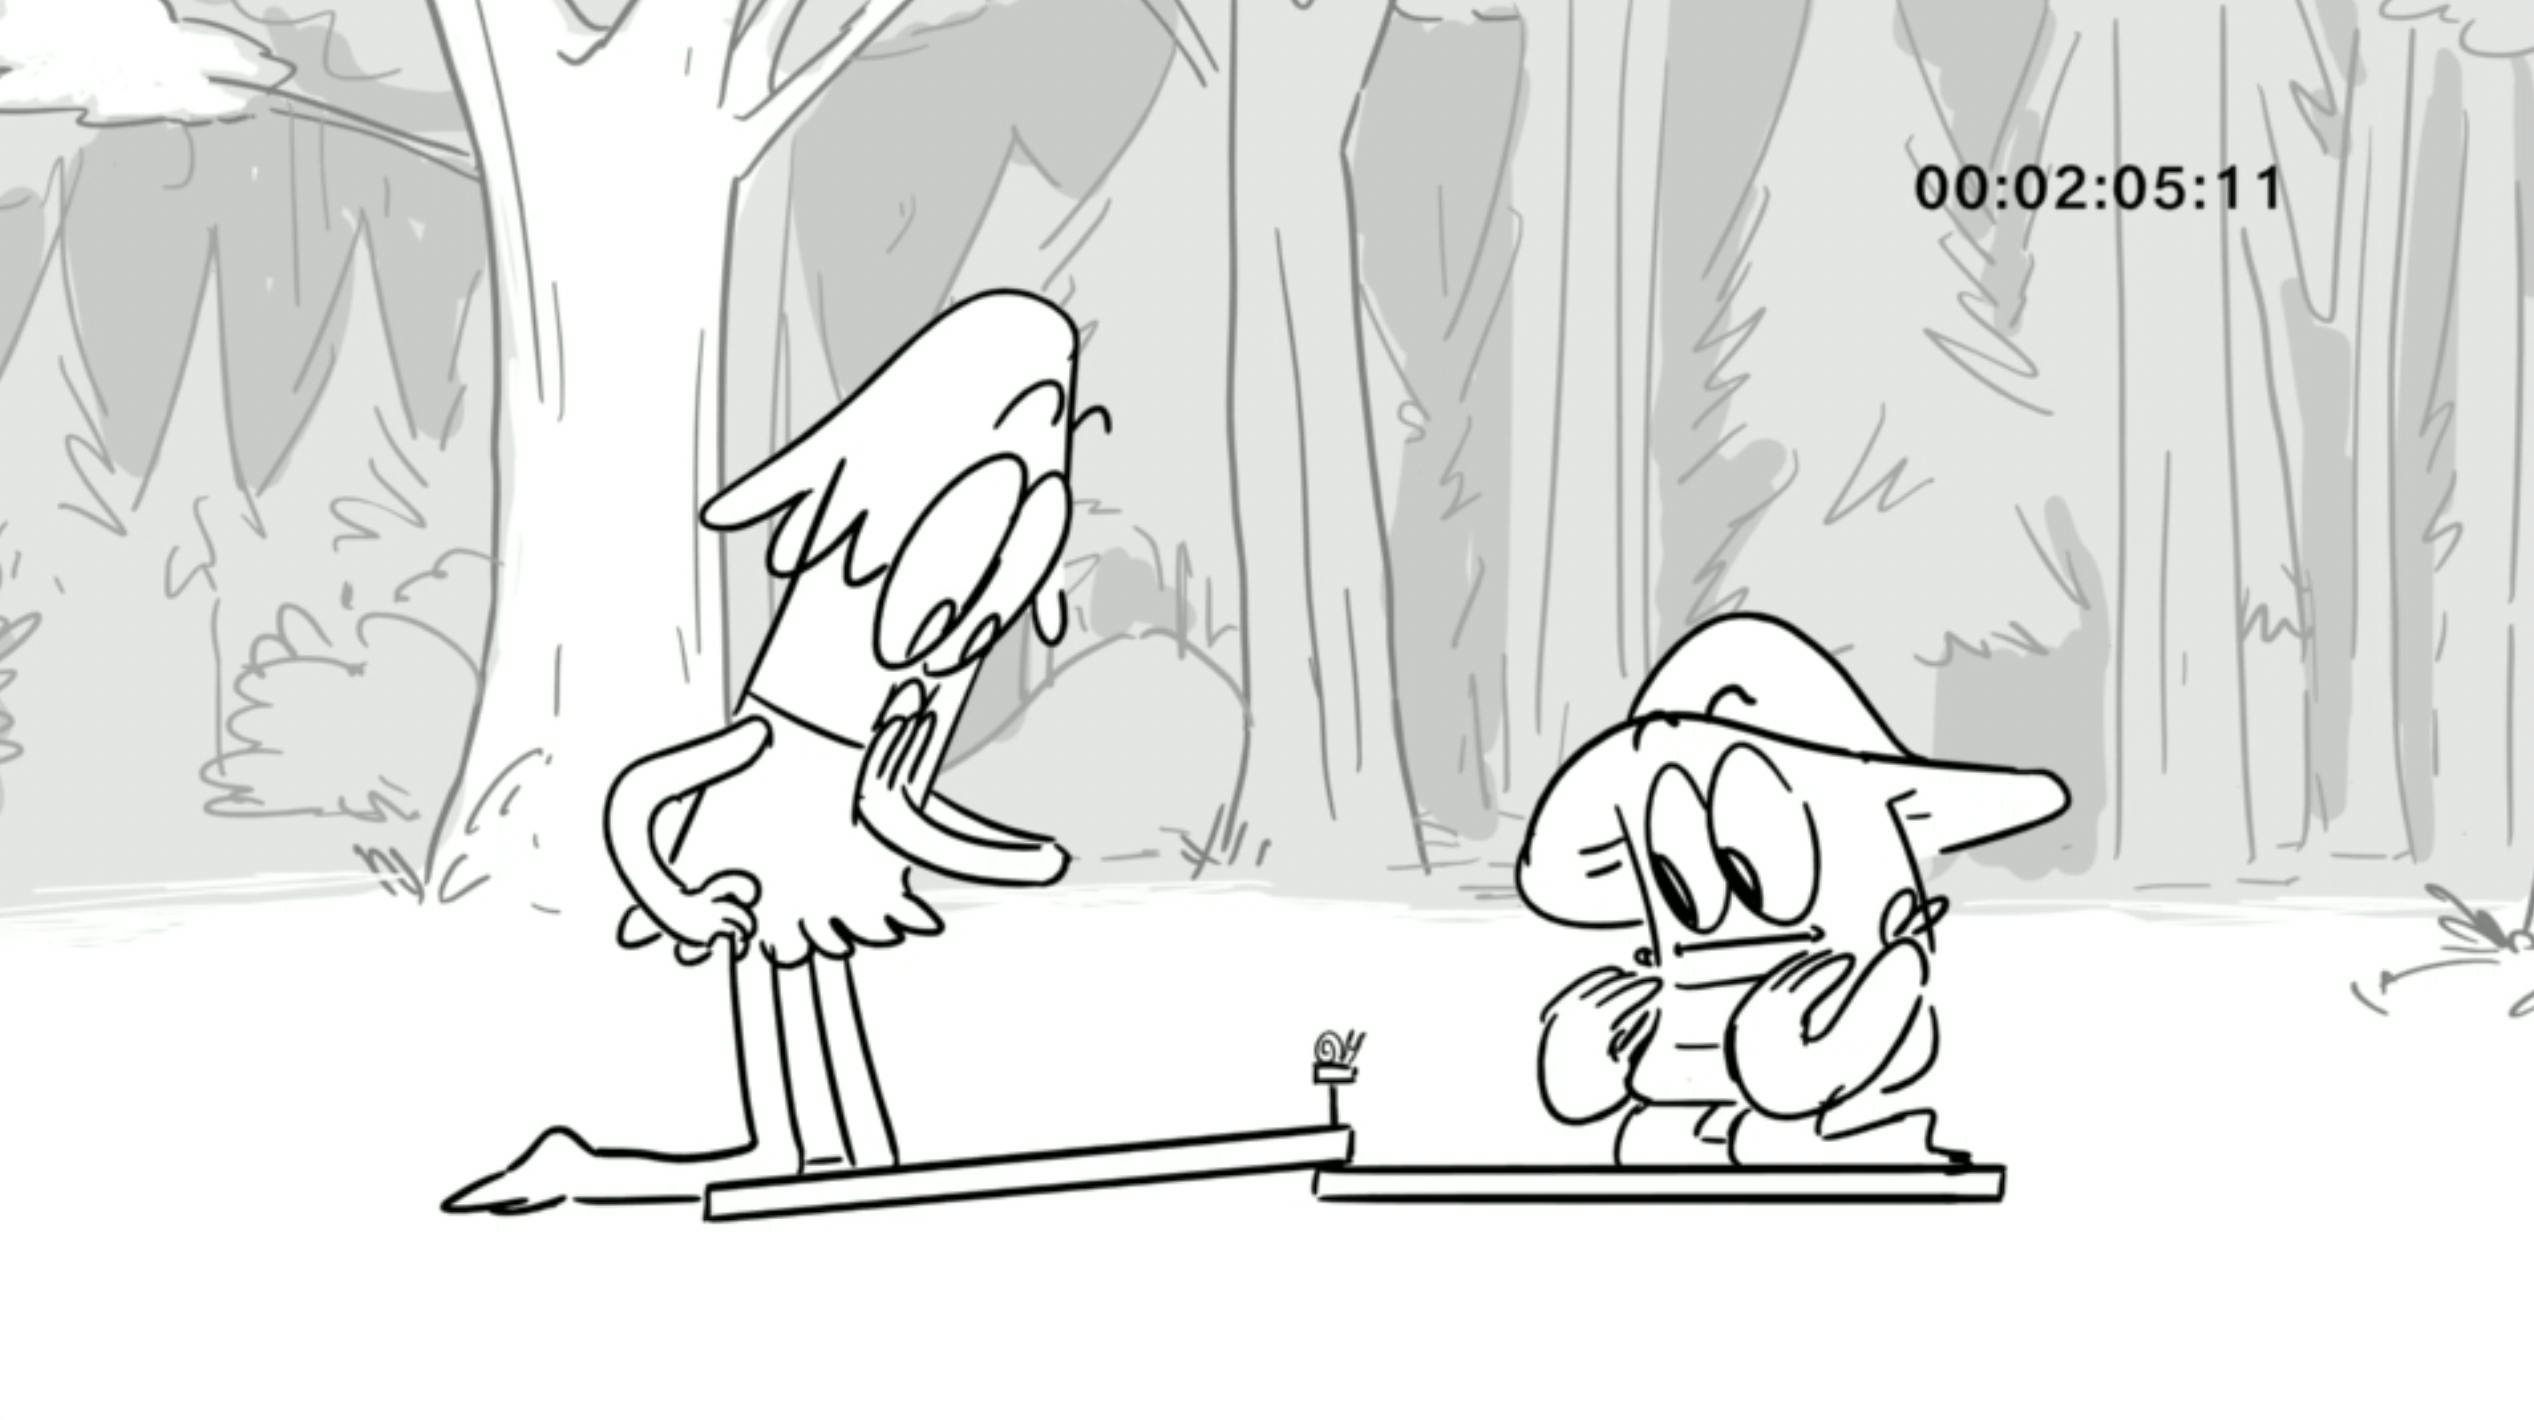
Perspective and Camera Angles
Perspective and camera angles are important for making a storyboard more interesting and engaging. Changing where the "camera" is placed helps show the scene in different ways and adds energy or emotion to each shot. It also helps guide the viewer’s focus and sets the tone for what’s happening.
Using a mix of wide shots, close-ups, and different viewpoints—like high or low angles—adds variety. A wide shot can show the setting or action from a distance, while a close-up highlights something important, like a character’s facial expression or an object. Good perspective also creates a sense of space, showing how characters and objects relate to each other in the scene.
For example, in an action sequence, you might start with a wide shot of the main character running toward the viewer, then switch to an over-the-shoulder angle as they spot an obstacle. These changes in angle help the audience feel more involved in the moment.
Avoid using the same angle over and over, as that can make your storyboard feel dull. Also, make sure your chosen angles support the story—confusing or inconsistent perspectives can take away from the scene’s clarity.
Use of Color, Lighting, and Mood
Color, lighting, and mood can make a big difference in how a storyboard feels. Even though most storyboards are simple sketches, using a bit of color or shading can help show the emotional tone of a scene. These visual cues let the viewer know whether the moment is calm, intense, happy, or scary—without needing any dialogue or sound.
You don’t need to color every frame. Instead, use color to highlight important parts—like red to suggest danger or blue for a peaceful setting. You can also use shading to show whether it’s day or night, or to create shadows that make the scene feel more dramatic. Indicating where the light is coming from helps everyone involved in the production understand how the scene should be lit, which is especially important in emotional or suspenseful moments.
For example, in a horror storyboard, dark tones and shadowy lighting can build a feeling of fear, while a bright, sunny scene might suggest happiness or relief. Just be careful not to overdo it—too much color can distract from the story, and forgetting to show light sources can make a scene look flat or unclear.
Conclusion
A good storyboard is the blueprint for your final project, whether it's a video, commercial, or animation. By focusing on clear storytelling, concise visuals, well-paced flow, expressive characters, dynamic camera angles, and effective use of color and lighting, you can ensure that your storyboard effectively communicates your vision. Avoiding common mistakes like cluttered visuals, flat pacing, or static angles will keep your storyboard engaging and purposeful.
